CHAZ ORTIZ - COMPUTER SCIENCE


Agile Process Model

Agile Process Model:

Agile software engineering is a philosophy and a set of development guidelines that encourages customer satisfaction and incremental delivery of software. An Agile team is self-organizing, and fosters communication and collaboration. Software engineering is fast paced and ever evolving, and it is often difficult or impossible to predict how a system might change as time passes. Agile is a fluid process that delivers successful systems quickly.

Full-Stack Engineering

Full-Stack Engineering

I focus on server-side functionality to enable communication between web browsers and data sources. My expertise includes ensuring robust database connectivity, secure data management, and API integrations. I work with technologies such as PHP and SQL to connect the front-end and the back-end of the website. My approach to relational database design focuses on normalization and optimization.

Secure Software Development

Secure Software Development

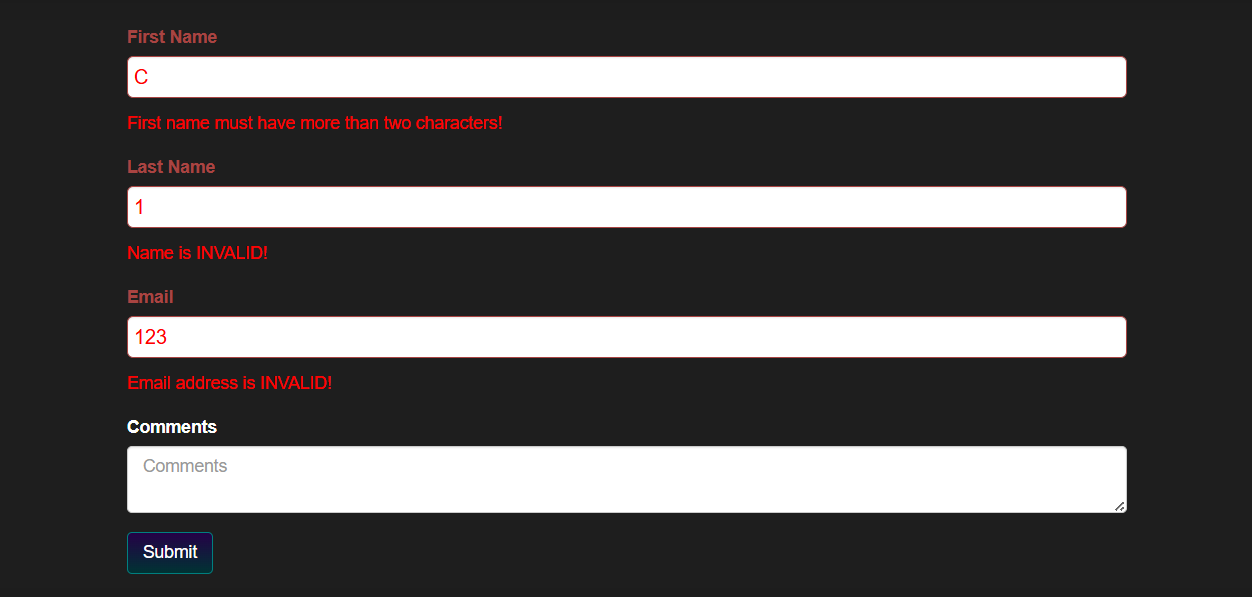
I build security into my web applications from the start. In my UTSA software engineering projects, I validate input on both the client and server side, sanitize input before it reaches my SQL databases, and protect admin pages with username and password authentication. In my security coursework, I used OWASP ZAP to intercept requests and fuzz web forms, then recommended mitigations such as HTTPS, strong password policies, and hashed, salted passwords.

react home
React Web Application
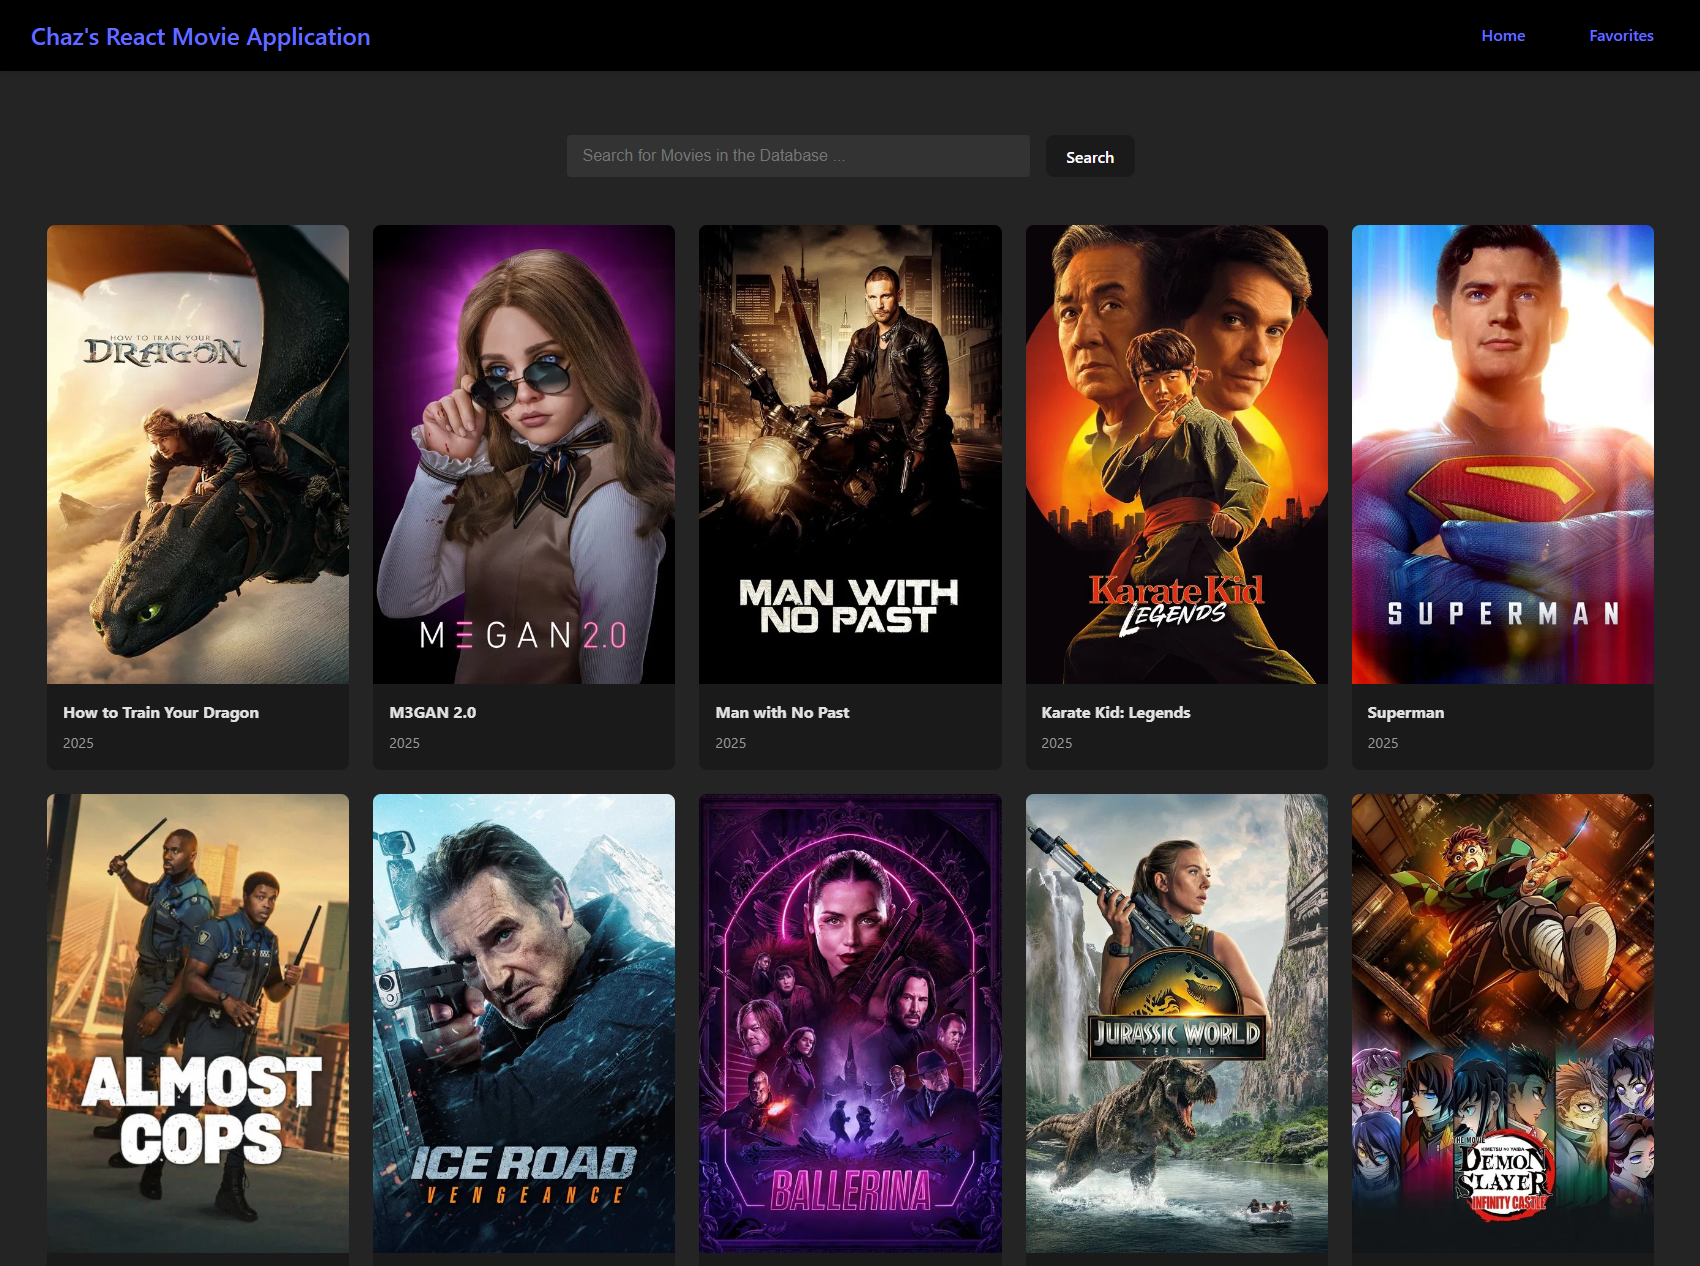
This extracurricular project was my first time programming in React, and it is based off a tutorial from Tech with Tim's YouTube channel.

I wanted to learn React because it is used by industry leaders such as Uber, Twitter, Airbnb, Facebook, and Netflix. After learning HTML, CSS, PHP, and JavaScript, I wanted to build a web application using a modern framework outside of what I learned as part of my computer science degree.

You can run the application yourself by cloning it from my GitHub repo and following the instructions on the readme file:

GitHub LogoGitHub

Search Engine


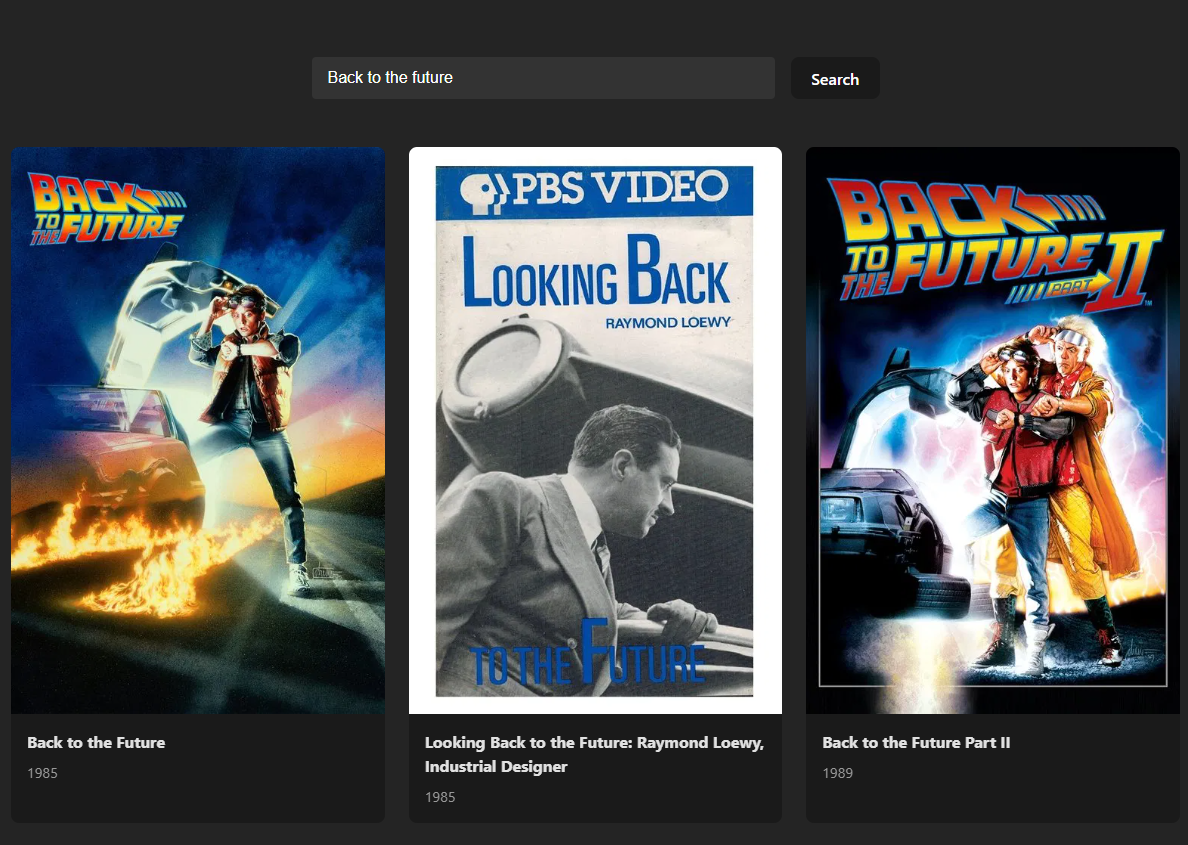
This application features a movie search engine that connects to a publicly available API that allows the application to display the most popular current movies. The user can add a movie to their collection of favorite movies by hovering over the movie and pressing the heart button.

This application uses Node.js, which is a JavaScript runtime environment that allows us to build the app. It also uses Vite, which is a lightweight web server that allows us to run the application.

search

main

Programming in React

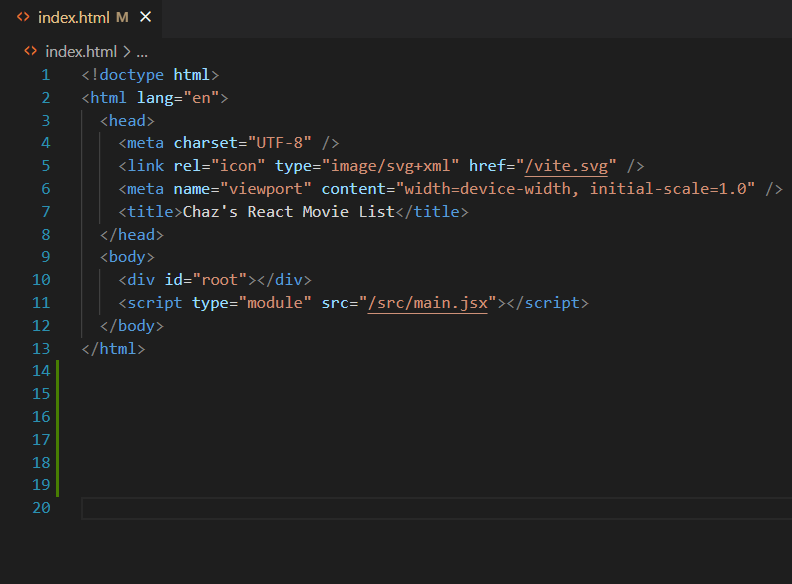
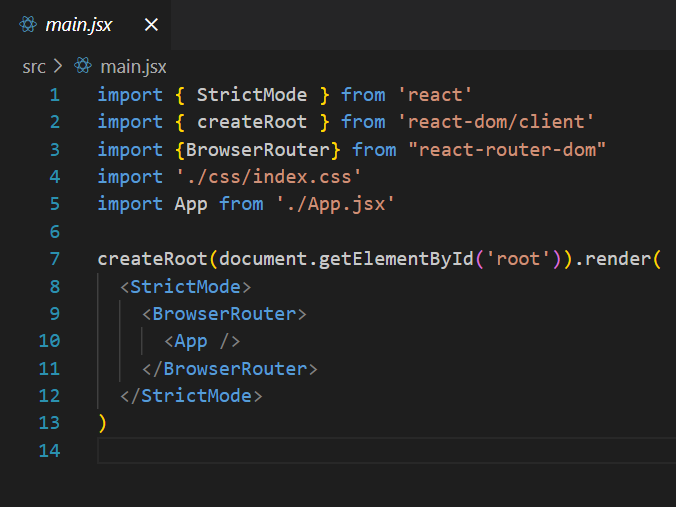
As part of my computer science degree, I learned how to create web applications using HTML, CSS, JavaScript, and PHP. In those traditional web applications, there is usually an index.html file that contains many different HTML elements and other code inside of the body element. In React, index.html is where we inject our React code. we have a div with an id "root". Most of the code goes inside that. React handles the Document Object Model (DOM) and the HTML that gets rendered to the page.

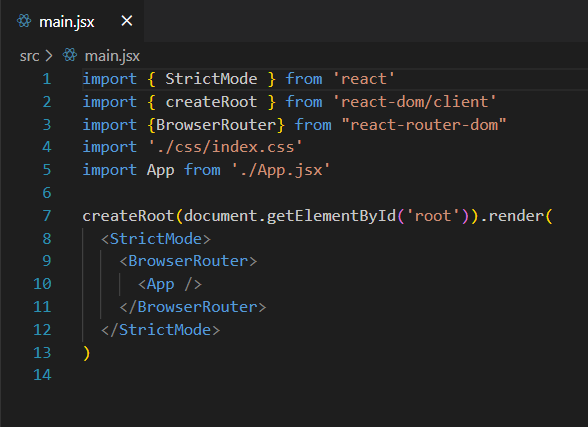
We have a main.jsx file that imports some dependencies, then looks for the 'root' div inside the HTML file, and renders the react application inside it, by using the App component, which is where we start the application and is where our react code lives.
main
text component

Components

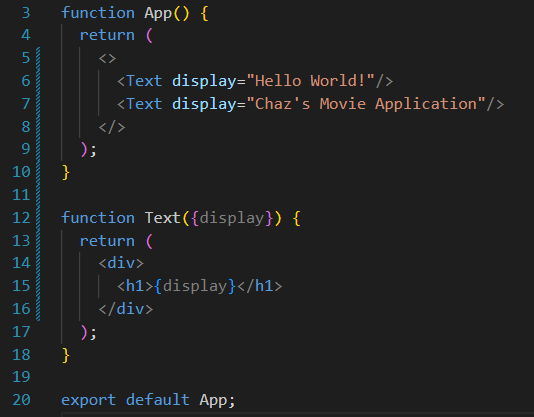
React uses components, which are re-usable parts that can be combined together to create user interfaces and apps. Looking at the App component, we can see that Components are JavaScript functions, and they start with a capital letter. In this case, I'm returning a fragment with two divs inside of it that contain some HTML elements with text inside of them.

However, for this app, what we really want to do is create re-usable components that we can render multiple times.

Dynamic Rendering

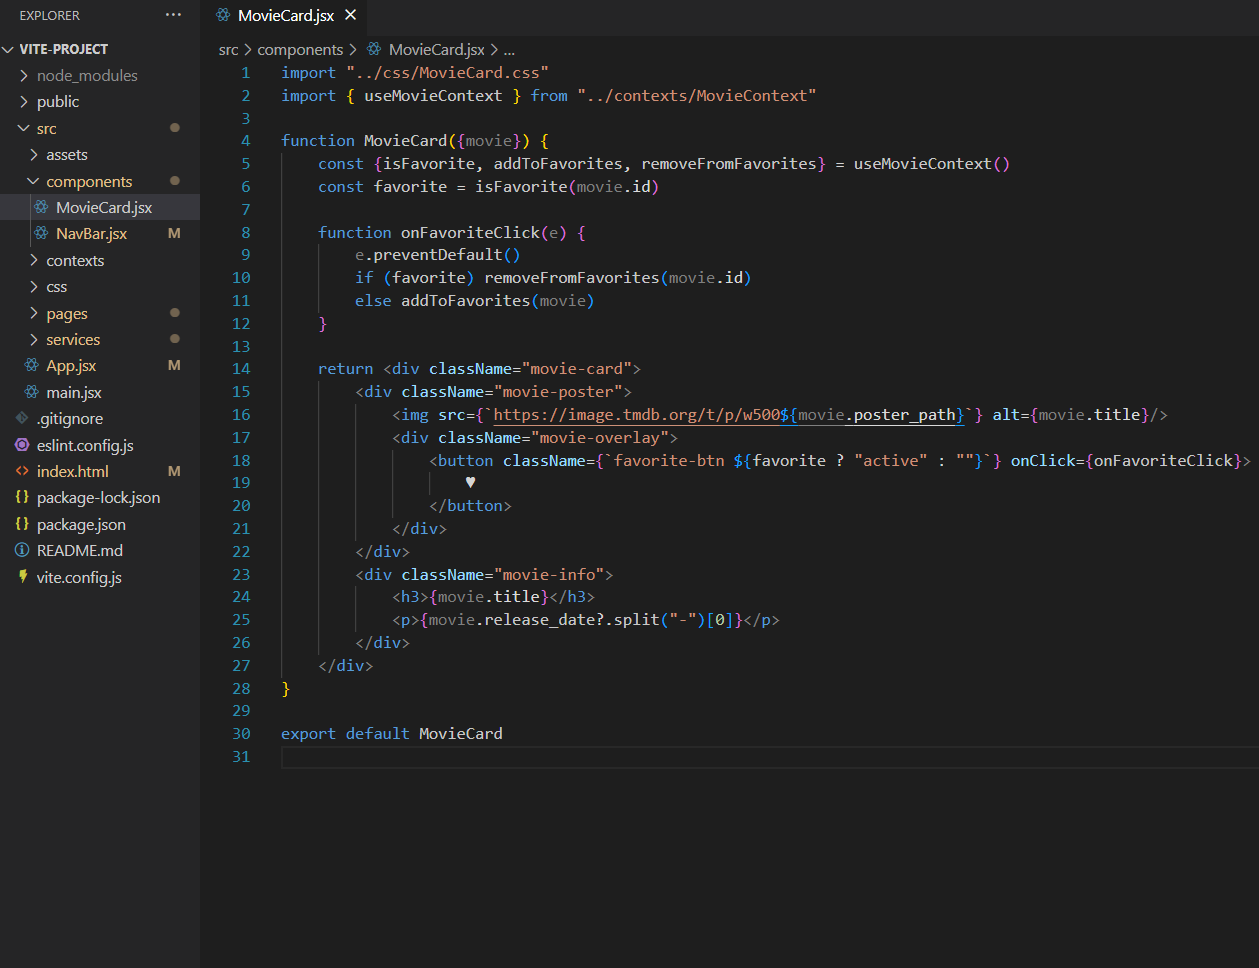
MovieCard will accept a prop, which will be an object that has information about the movie, such as the title, release date, and an image. We want to return jsx code starting with a root component, which will be a div with CSS classes. Then we can display the MovieCard component multiple times on the website. Because we want the image src to be dynamic, we can use curly braces so that we can embed a variable inside of it. We put more divs inside this div to represent the image and a favorites button using an onClick event. To do that, we create a function inside of our original function called onFavoriteClick. We also create another div for the movie title and release date, using curly braces again because the information will be dynamically passed as a variable coming from the prop.

Lastly, we need to export MovieCard so we can access it from another file. Then, we can import the MovieCard component into our App.jsx file.

search

text component

State Handling

For the Search bar, we want to be able to handle the state of the component, so the text the user types into the search bar is displayed. We can use a hook by typing:

import {useState} from "react".

Now we can define a state for our component. We create an array, and inside of it we have a state and a function to allow us to update the state. When we update the state, the component will update itself and re-render on the screen. Inside the return statement, we define the onChange() function to update the state from an input element. When the user types text into the search bar, the text is updated and displayed back to the user on the screen. That's because when we make a change to the input box, the onChange() function is called which updates the state and automatically updates the page.

Page Routing

We also created a page called Favorites that stores and displays the user's selected movies. In order to add this favorites page as a URL in our web application, we first need to set up the react router, which is a package we need to install using the command:

npm install react-router-dom

search

text component

API Connection

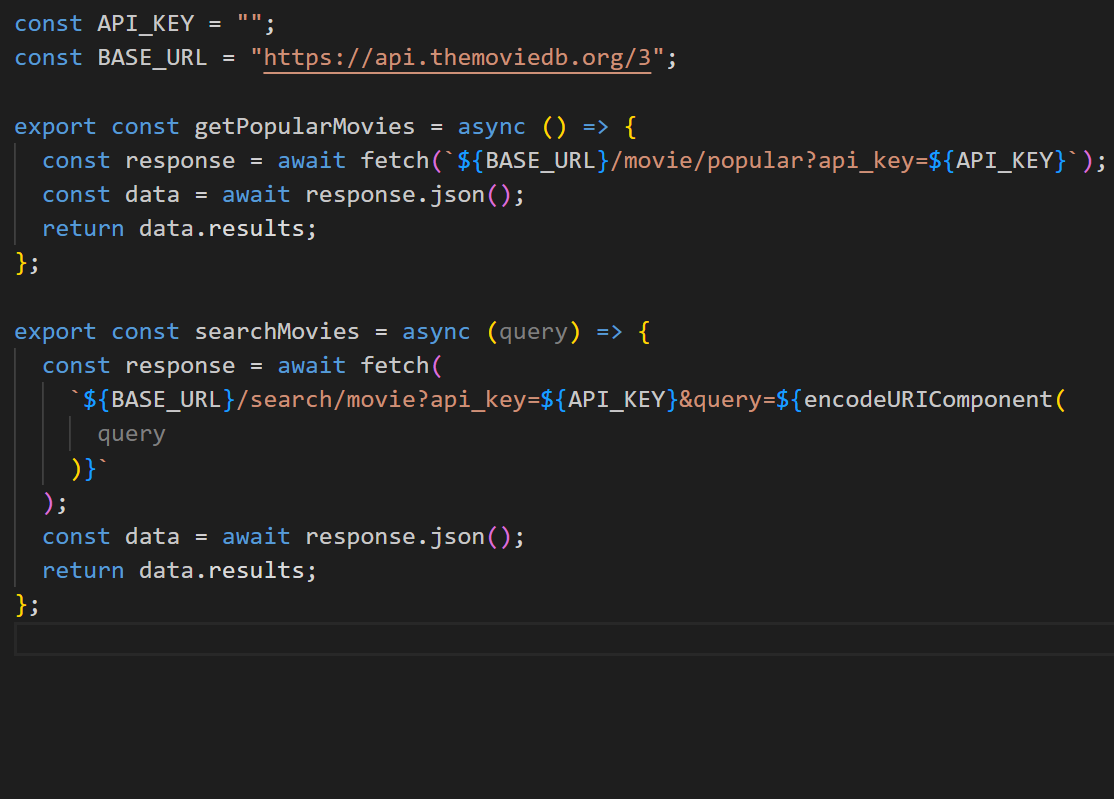
Instead of having to manually type in all of the data for all of the different movies that I want to be able to display, I want to get the data from a source. So, I connect to a free, publicly available database at:

themoviedb.org

To use the API, we need an API key. We can do this by making an account with themoviedb.org and filling out a form. Then, in our src folder, we create a new folder called services, and inside that folder, we make a new file called api.jsx which will contain our API calls.

useEffect

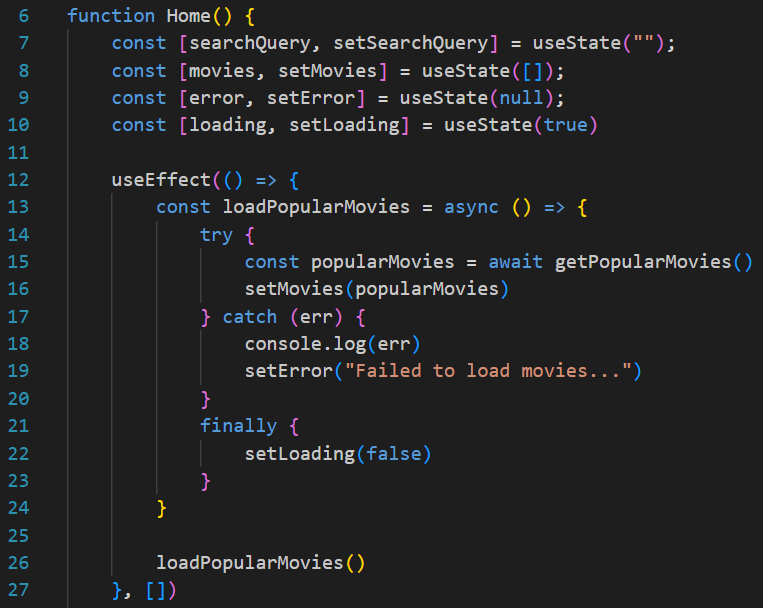
In this case, when something in the component changes we don't want to constantly fetch movies every time. Sometimes the movies haven't changed and there is no reason to fetch them again. useEffect() allows you to add side effects to functions or components to define when they should run. We only want it to run the first time the component is rendered. We need to import the useEffect hook from react:

import {useEffect, useState} from "react"

We're going to store our movies in a state using useState() so that they persist. Whenever we update the list, it will re-render the component. We write useEffect() as a function then put inside of it another function that we call when the dependency array changes. Whatever is inside the dependency array gets checked after every re-render and if it has changed, we run the useEffect(). If there is nothing inside the dependency array, it will run just one time when the component is rendered.

search

Angular Web Application

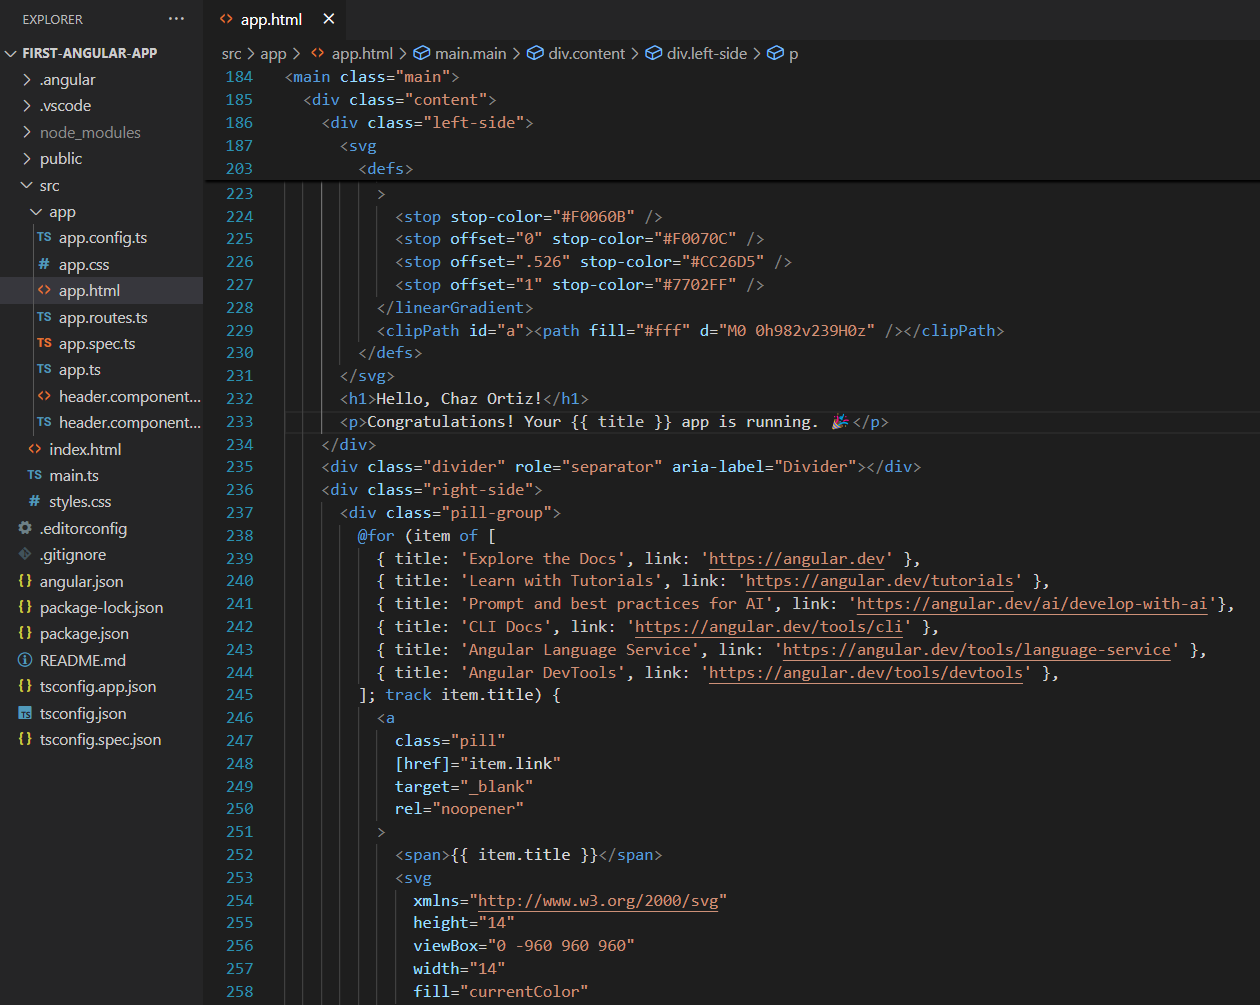
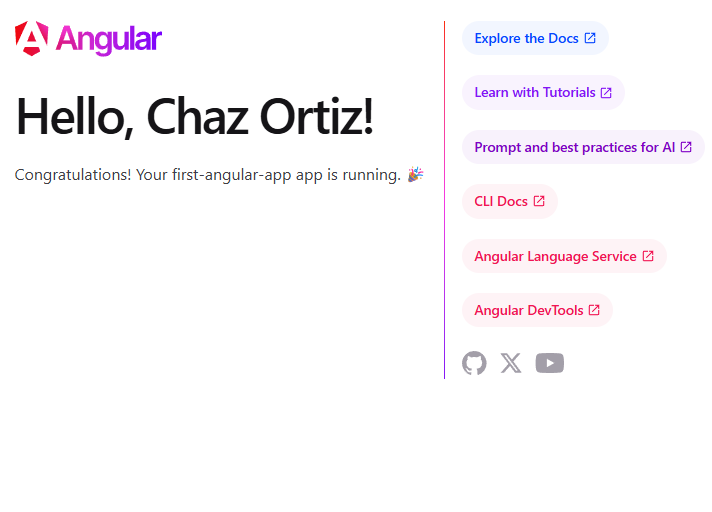
Angular was built by Google. It's a frontend JavaScript framework and a collection of tools that helps make building web user interfaces easier and more organized. I'm interested in learning Angular because it can be used for larger scale, enterprise level web applications. We first need to install the Angular command line interface (CLI)

$ npm install -g @angular/cli

Typescript is similar to JavaScript, but it uses types. Similar to React, in Angular we build individual components then compose them together to make the UI.
Github
Local API Website
PHP RESTful API
In my Advanced Software Engineering class at UTSA, I built a REST (Representational State Transfer) application programming interface. In order to do this, I first had to build a database, then web endpoints for my local website, then the API gateway and API endpoints, and finally migrate the local site to an external site.

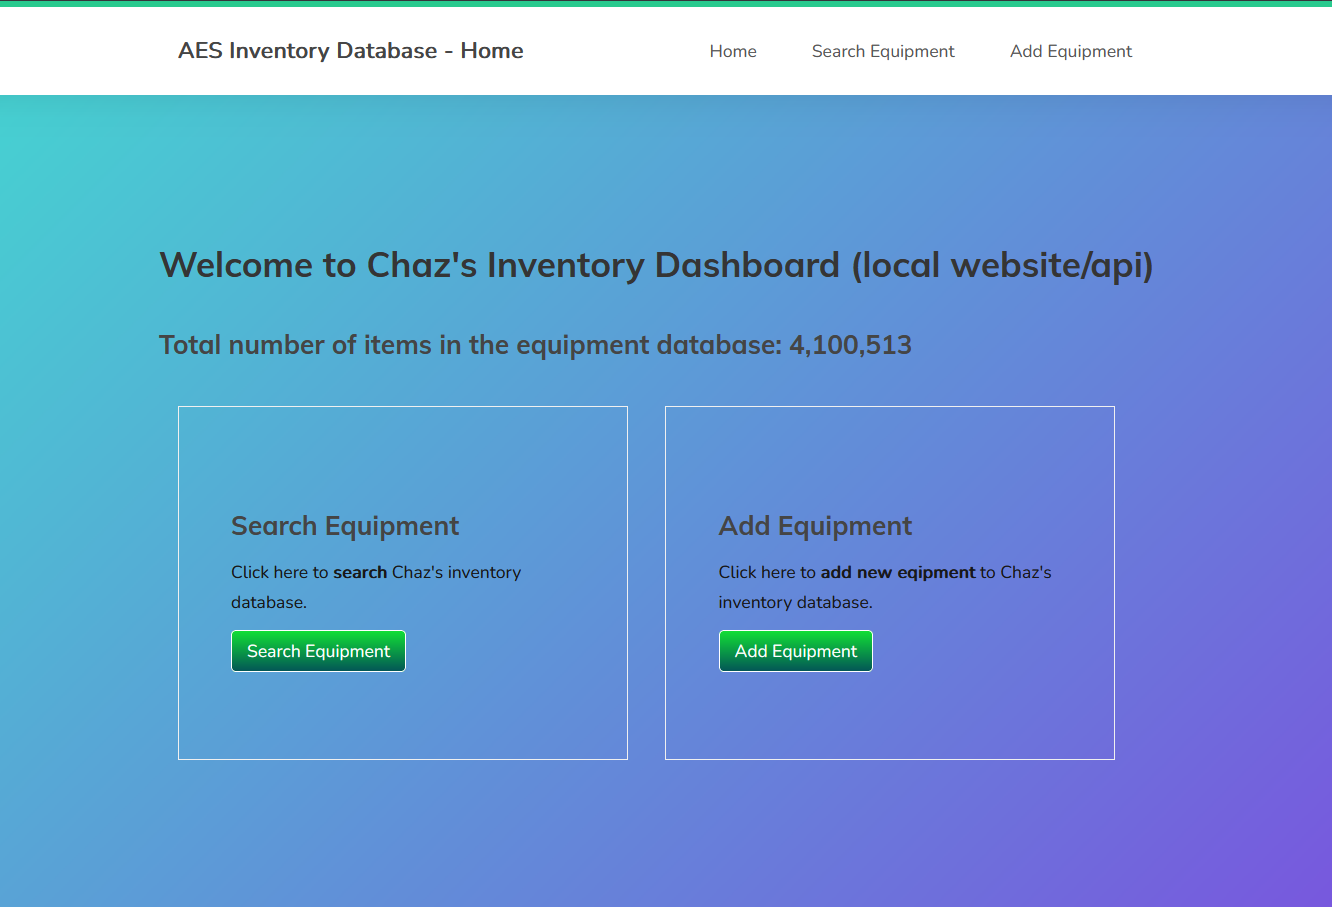
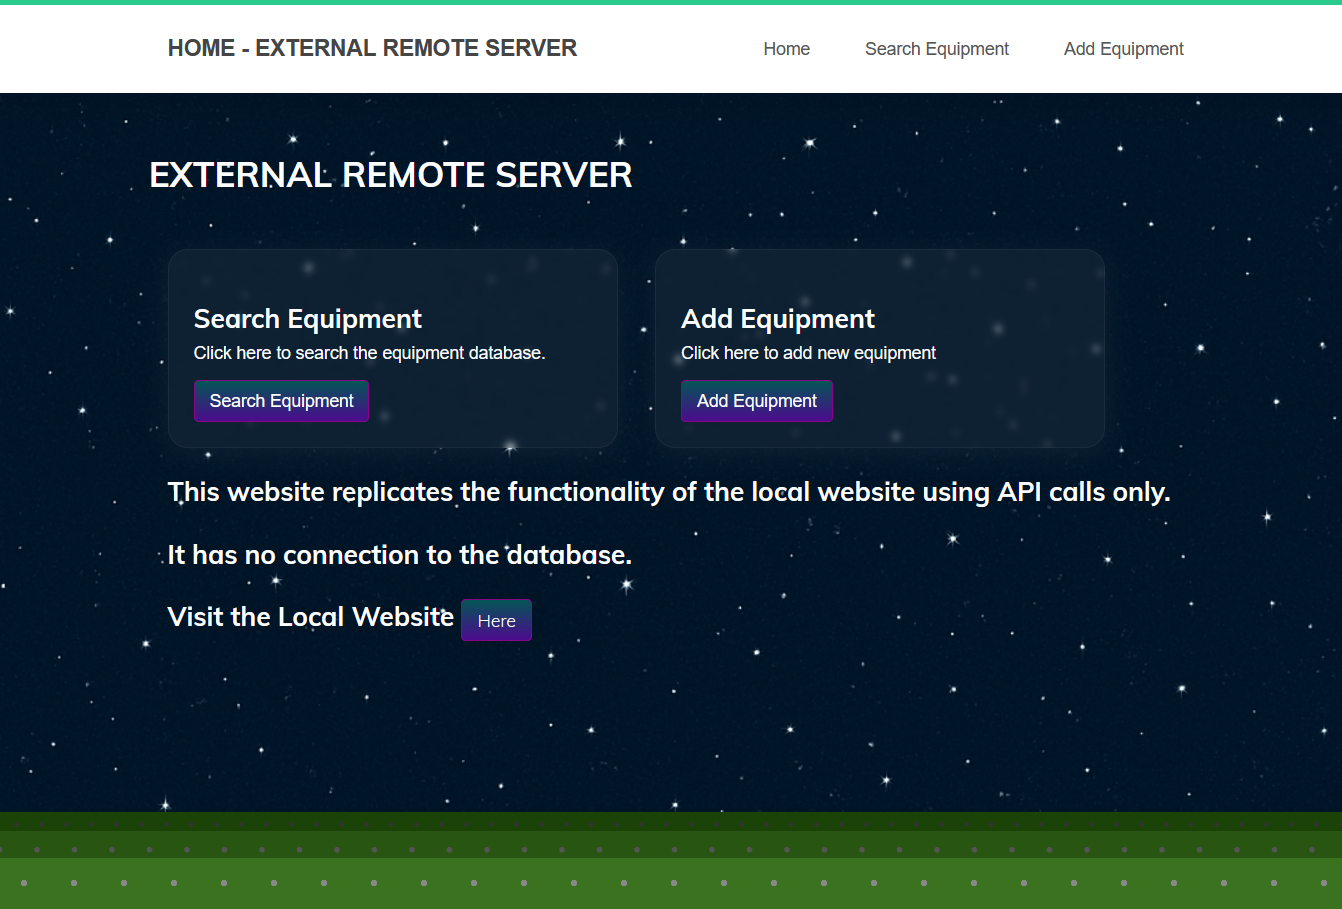
The local website has access to the database through SQL queries, and is able to search, add, and modify the records in the database. The remote website is on an external server, and does not have any access to the database. Instead, I converted the remote site to replicate the functionality of the local site through API calls only, making it usable to either a human via the web interface or another system through the API interface.

Visit my local inventory dashboard website here:

Local Website

API Endpoints

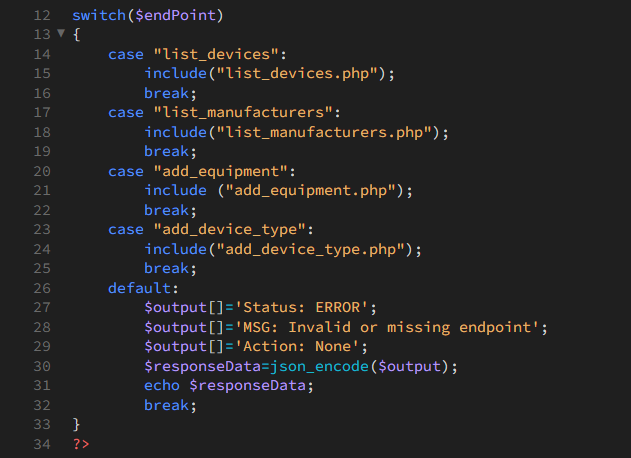
In order to render the states, I use a json encoded array as a payload to be rendered by the external site, so that the API controls the states. I created API back-ends that query the external server to receive updates in order to modify records in the database.

Here, you can see a simplified version of my API gateway, and how I use a switch statement to add and grow routes without adding overhead as opposed to if-else statements, which would need to all be evaluated even if the desired statement has already been found. This allows the API to remain efficient without wasting unnecessary runtime.


View all the code on my GitHub repository:

GitHub LogoGitHub
API Endpoints


Add

Remote Website

The remote website calls the data from the back-end database of my local website without actually having any access to the database. I receive the json payload, parse it, and display it to the user.

You can visit the external, remote website below to see the site display data from a database that it has no access to, by using API calls only.

Visit the remote website:

Remote Website
Jira

Agile Development Model

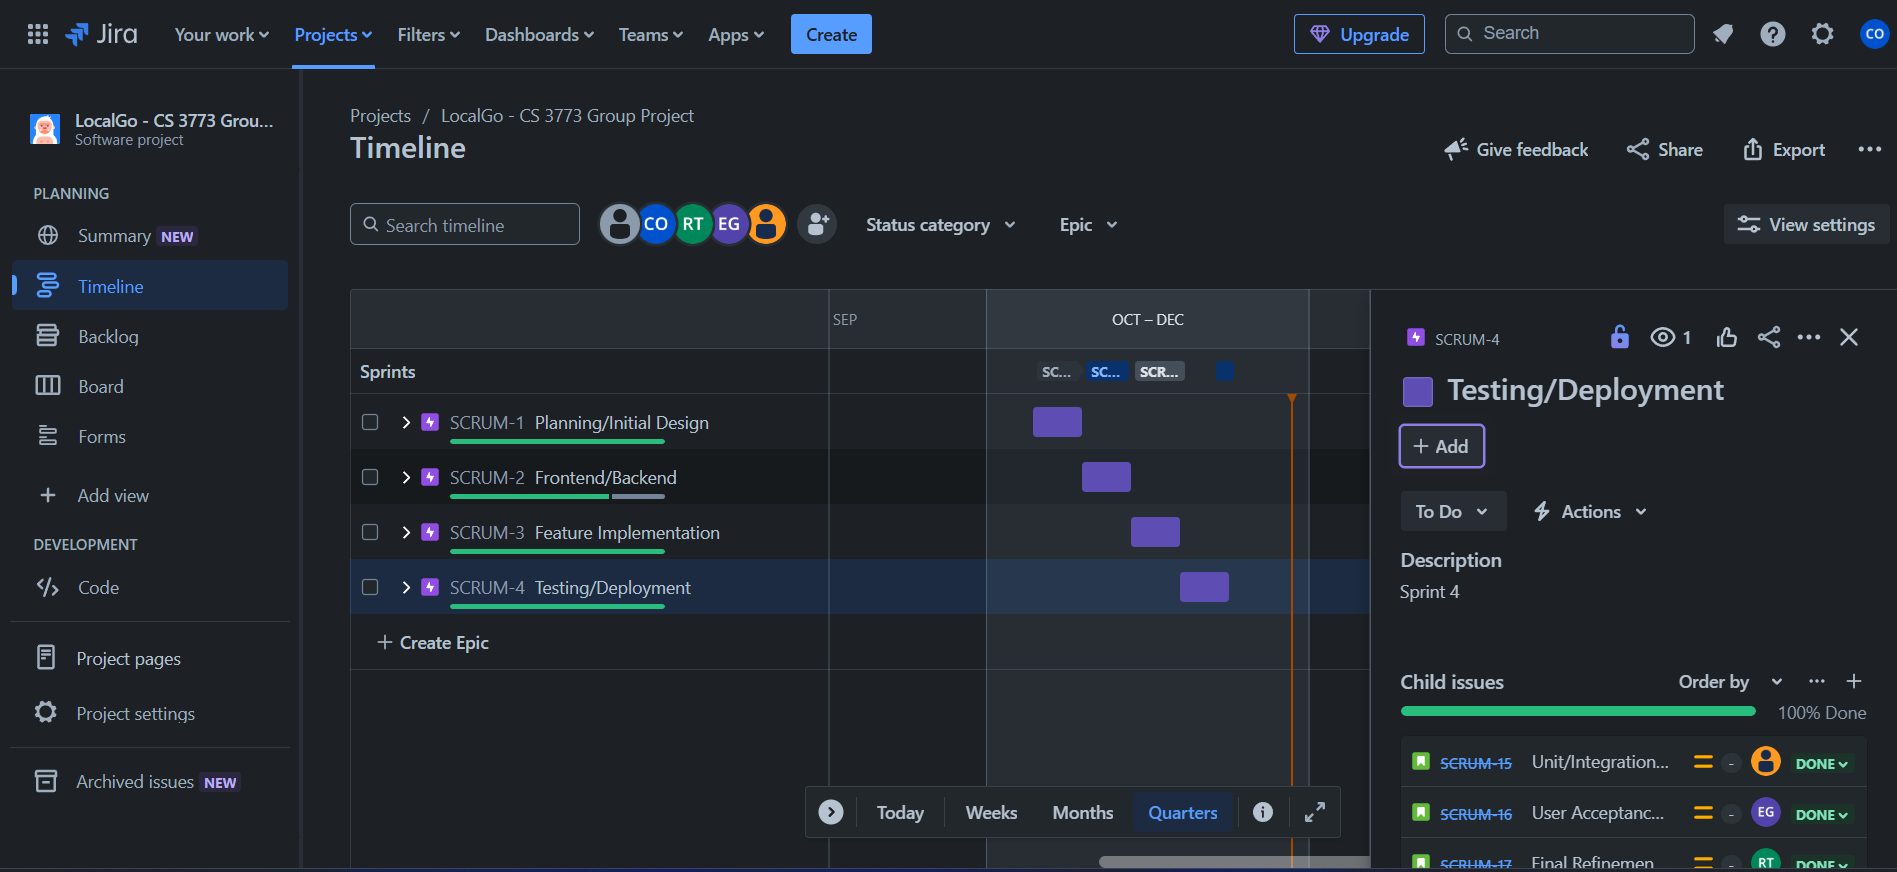
The Agile Software Development Process allows the flexibility to continuously adapt to new challenges as projects change and grow. Tools such as Jira can be used to organize sprints, user stories, and daily scrum meetings.

GitHub Repositories

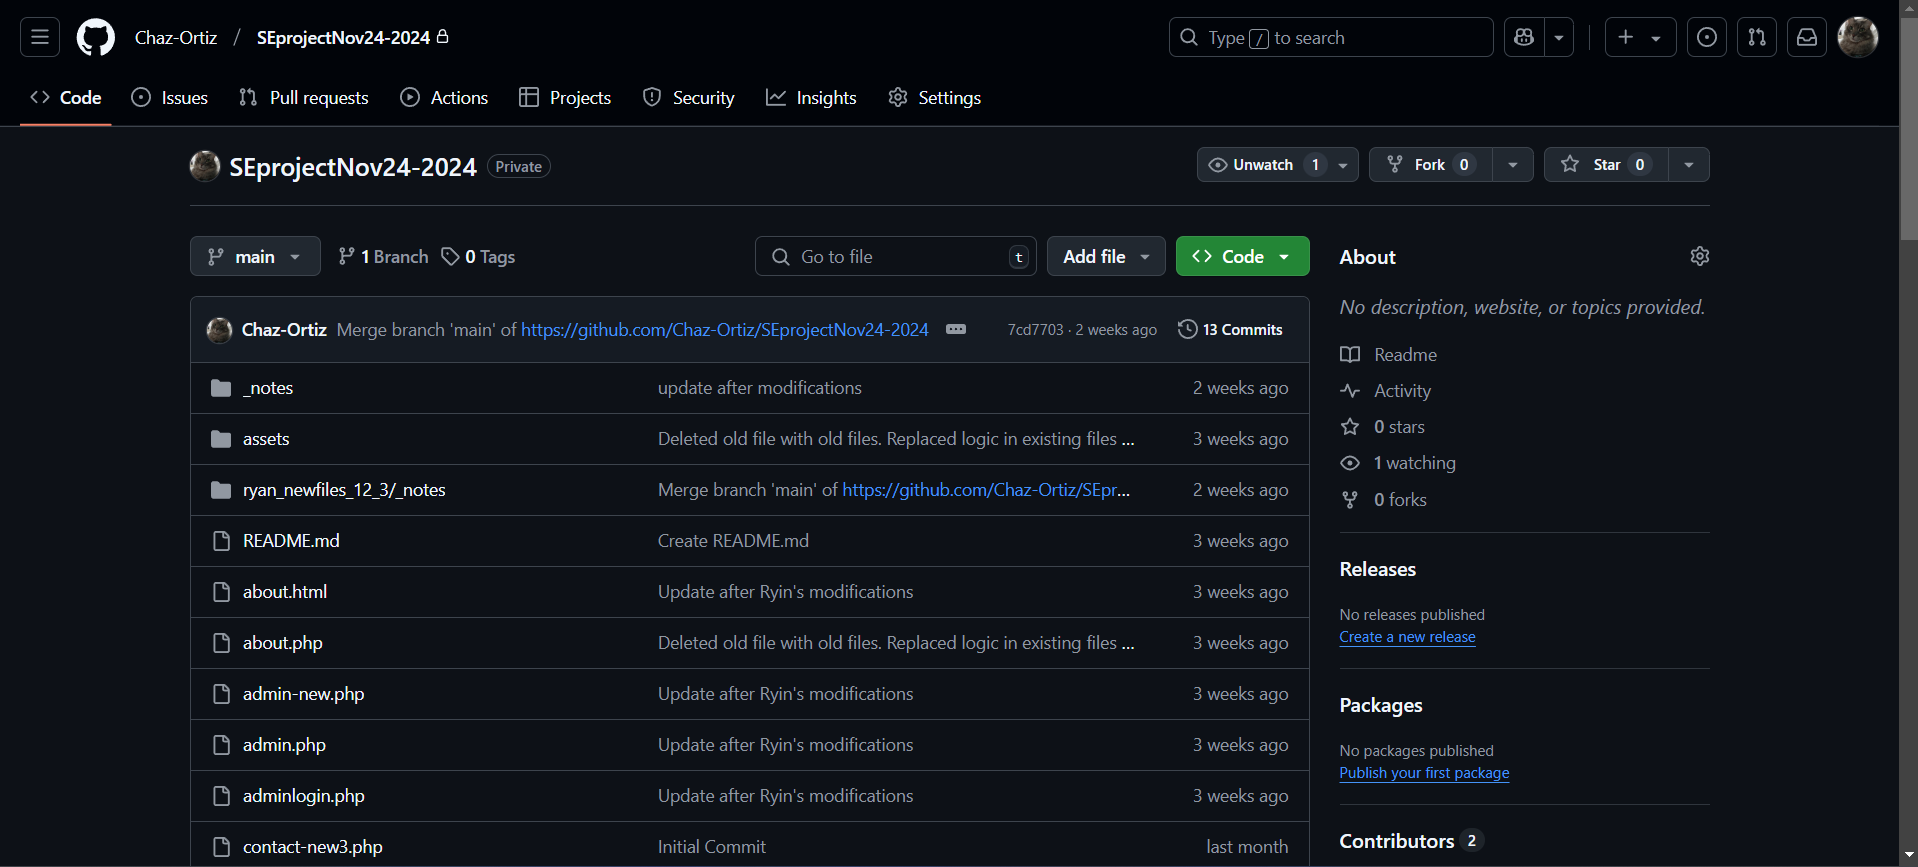
In order to collaborate remotely and share code, my teams generally use GitHub. In my software engineering final group project, each team member set up repositories, with my repository being the live repo that gets pushed to the web server. We also had a testing environment repository where team members could test out various features that were being developed.
Github

Upcoming Events
Music Venue Website

During my Software Engineering class at UTSA, I formed a group with three other classmates and we were given the opportunity to decide what we wanted to build for our class project. We decided to build a website for a live music venue, featuring a calendar of upcoming concerts on the home page. As the most experienced programmer in the group, I was responsible for creating the back-end of the website, including setting up a free-tier AWS account, with an EC2 instance running Ubuntu and an Nginx web server.

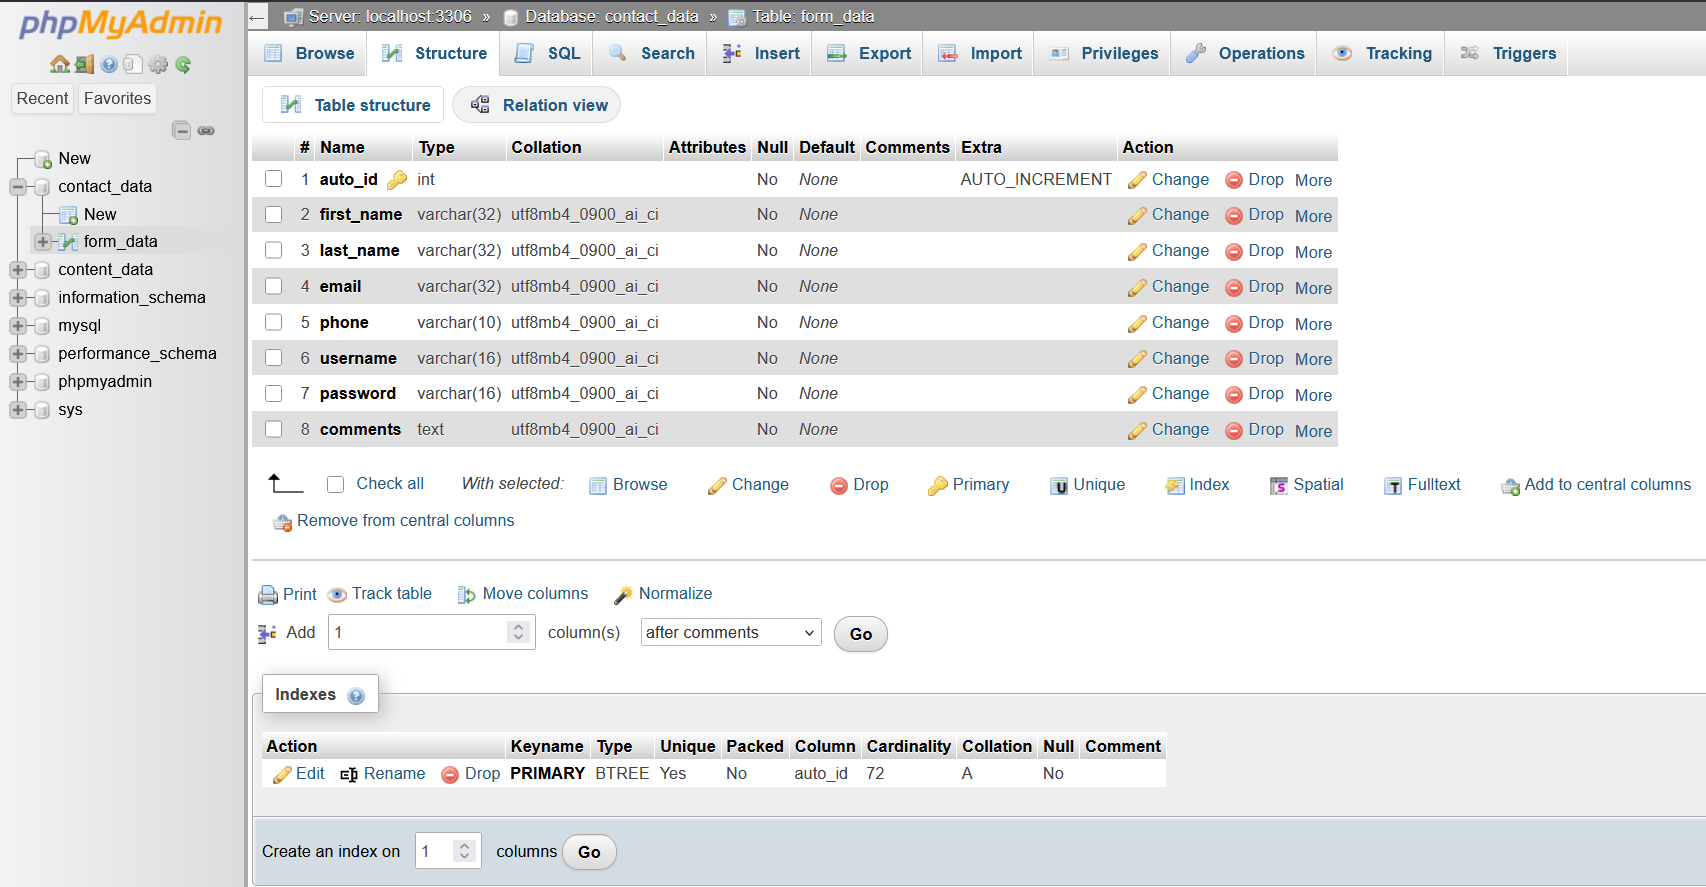
I also created the database using phpMyAdmin, and I was responsible for all of the php and SQL code that linked the front-end of the website to the back-end and database in the project. I also developed most of the front-end of the website, including the overall HTML structure of the individual web pages, including details such as custom CSS elements to facilitate a glassmorphic effect in the navigation bar and footer.

Visit the music venue website here:

Music Venue

Authentication and Authorization
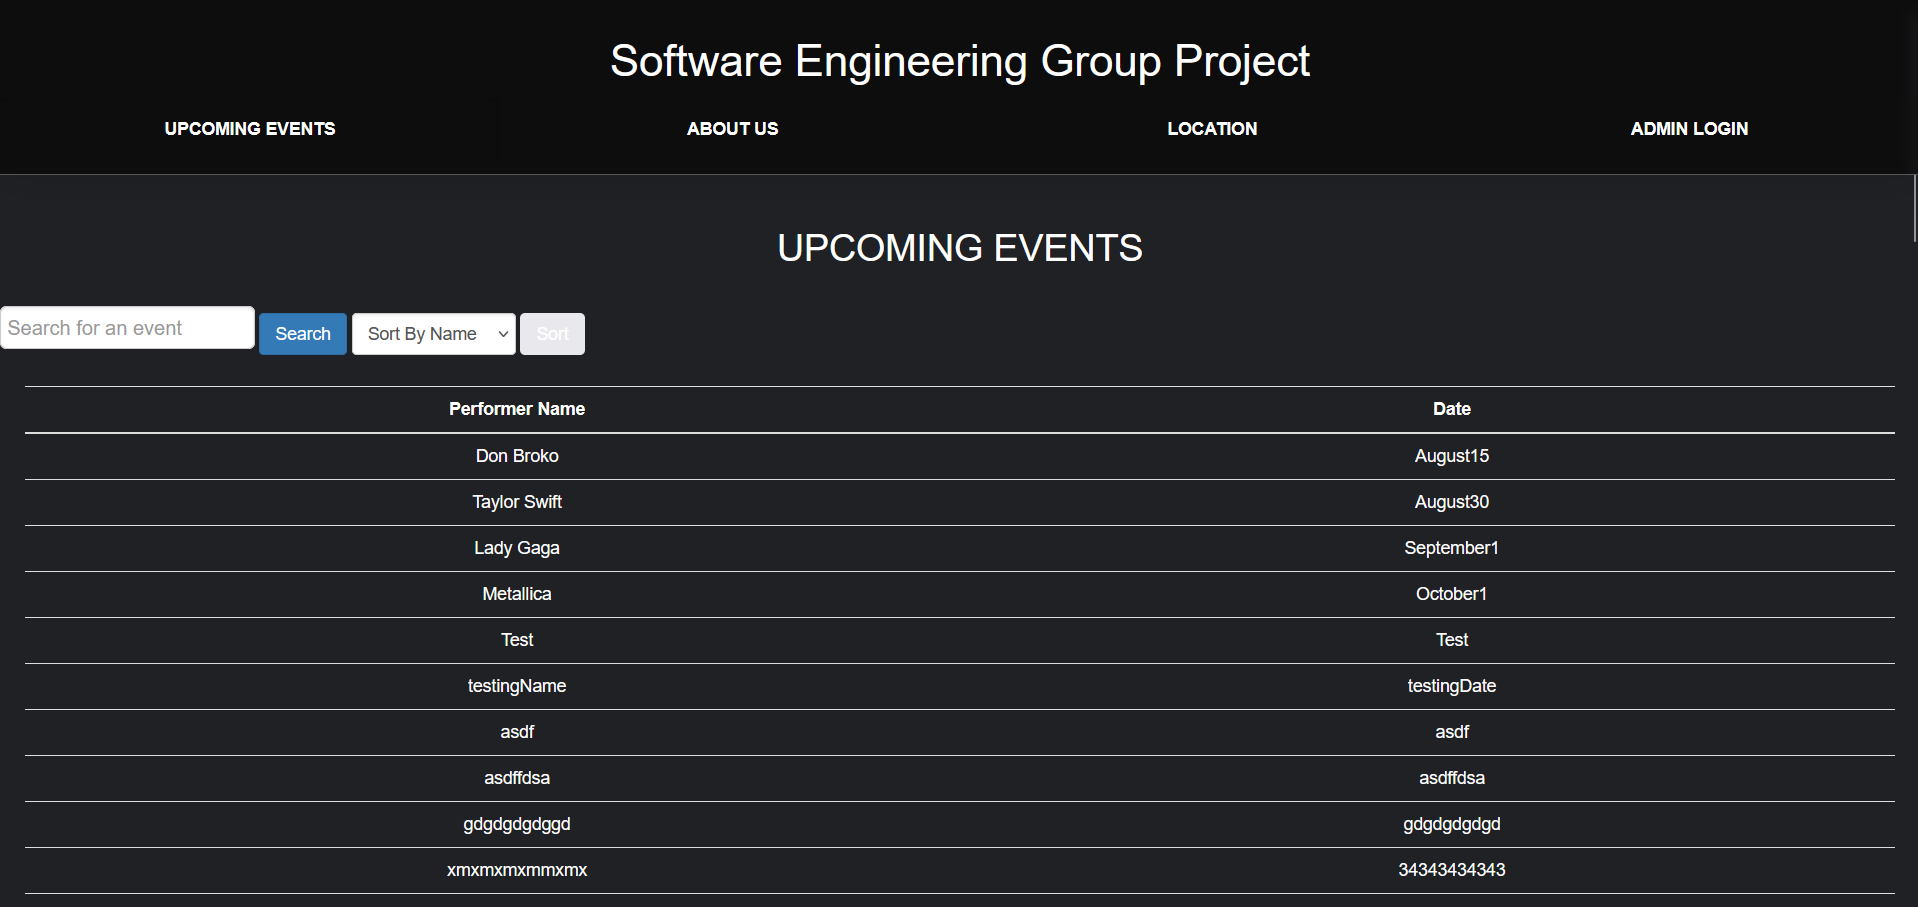
The "upcoming events" page features a vertically-listed calendar where users can view details of the concert, such as the performer and date of the event. This page also has a navigation bar that allows the user to navigate to the other pages of the website. The listed calendar of concerts can be updated by users once they have registered as an administrator in the SQL database. This will allow the user to add a new concert to the list, including the performer's name, and the date of the event.

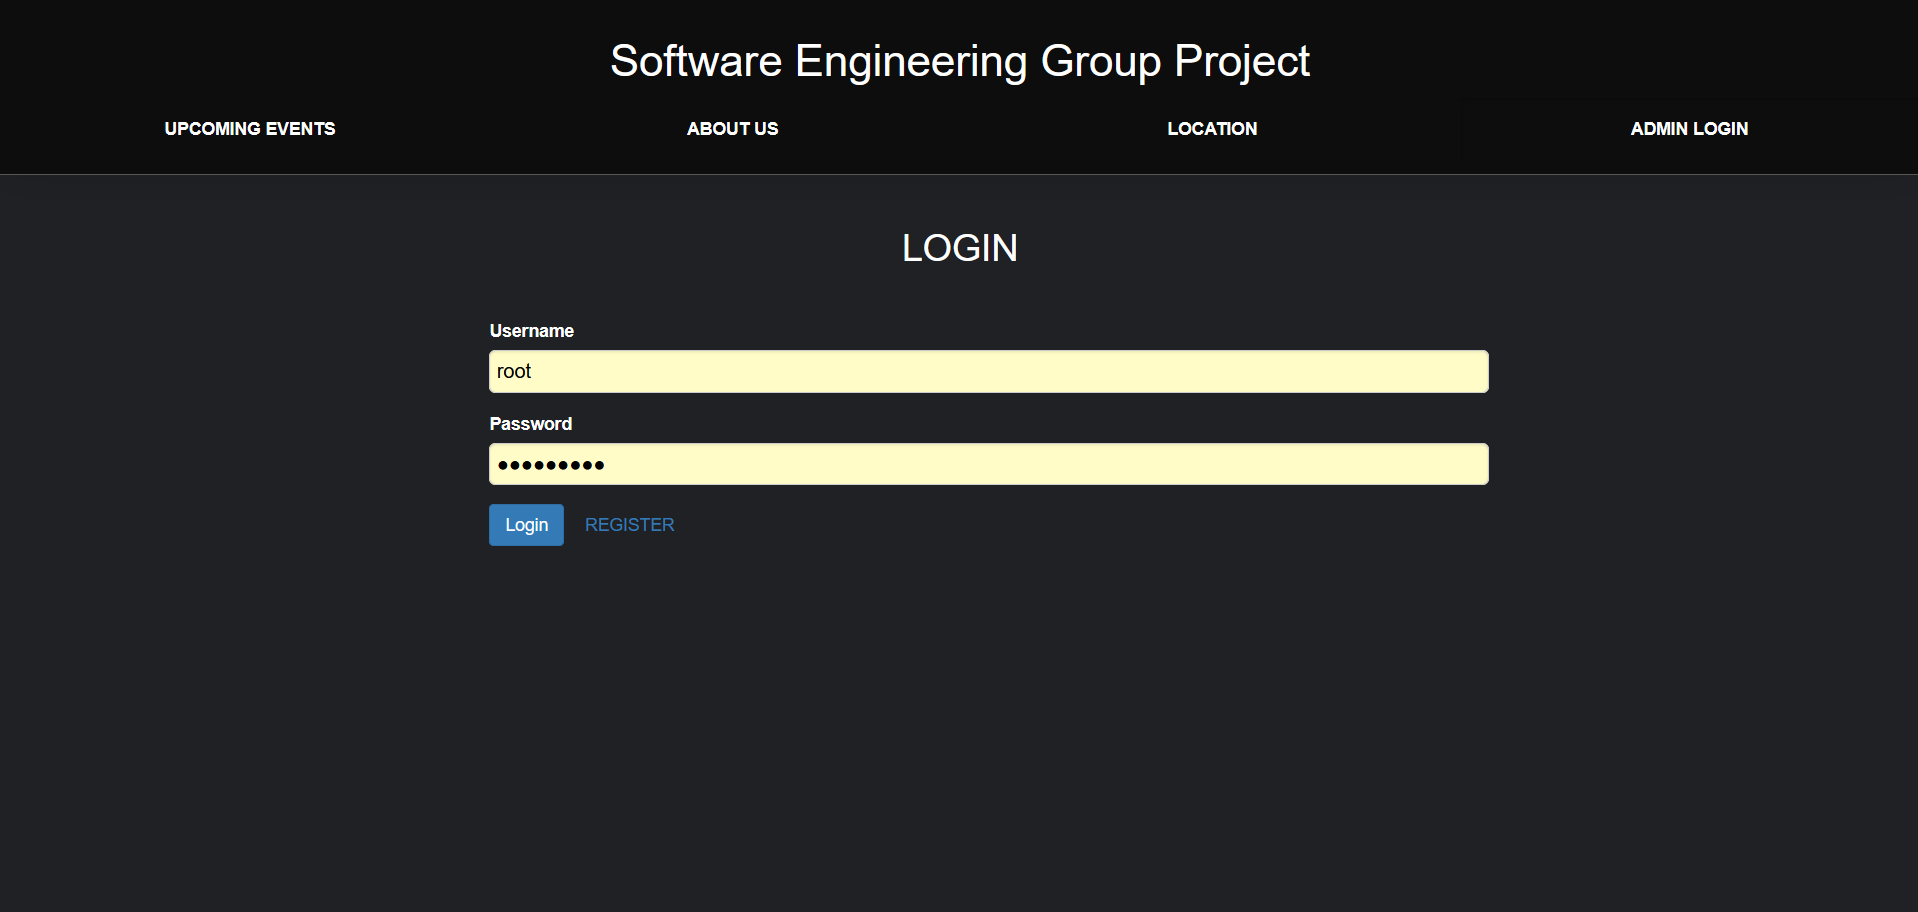
The Admin Login page has two areas for user input, and the user must be authenticated by entering a correct username and password combination that is stored in the SQL database. If the user enters a correct username and password, they are taken to a Booking page, where they can add an event to the calendar on the upcoming events page.

If the user does not have a correct username and password combination, they are denied access to the Booking page. The user has an option to click on the Register button, which takes them to the Registration page.
Login
Sanitization

Validation and Input Sanitization

On the registration page, The user must enter their data, which is saved in an SQL database.

Once they do, they are registered as an administrator and can use the username and password they created to login and add events to the calendar.

SQL Database Integration

The most interesting part of this project for me was integrating the database into the site. I used SQL and phpMyAdmin.

I had to take special care to adhere to secure software development techniques such as sanitizing input.

I also designed a schema in SQL including tables and relationships between entities.

View the code for the project on my GitHub:

GitHub LogoGitHub
phpMyAdmin
Chaz Ortiz